

After rain, mud and stones may stay around the boot on one hike, while on another, wet vegetation brushes against your trousers or snow reaches higher up. The same forecast does not automatically mean the same gaiter height. What matters is where moisture or debris gets in, how high it reaches and how long it acts on the gear. Only then should you consider material, size and fastening.
What should the gaiter cover on your planned route?
Turn the contrast between two post-rain routes into a contact map. On a firm path, mud and small debris may stay mainly around the sole, upper and edge of the boot. On an overgrown section, however, wet grass brushes against your trousers from the side; on a snowy stretch, snow is pushed higher with every step. The forecast may be the same, but the affected area is not.
Low and high hiking gaiters therefore cannot be defined by a single universally applicable number of centimetres. The practical difference between low and high gaiters is their reach: a lower design mainly covers the footwear and its immediate surroundings, while a taller one extends further up and covers more of the trousers. The model name is only a guide; what matters is where its top edge actually reaches on your outfit.
Before choosing, divide your route into sections and consider four things for each one:
- Source of contact: Find out whether the issue arises from stepping on wet ground, splashing mud, walking through snow or rubbing against wet vegetation.
- Direction of ingress: Determine whether debris is heading towards the boot opening from above, splashing onto your trousers or coming from the side through contact with vegetation.
- Upper limit: Picture a demanding but realistic section and mark the highest point that will regularly get wet or dirty — not just the first mark after a single step.
- Duration: A brief crossing of a puddle places different demands on your gear than prolonged rubbing against wet vegetation or repeatedly picking up snow throughout a section.
This helps you avoid shortcuts such as “rain means high gaiters” and “a short hike means low ones”. Even a short overgrown stretch can raise the upper limit of contact, while a longer walk on firm ground may only extend the exposure within the same area. Assess the height of the contact and its duration separately.
Put the result into a sentence: “I expect contact from this level to this level, and it will be one-off or repeated.” This gives you the coverage you need rather than a vague requirement for gaiters for rain. You can then assess whether a smaller covered area will be enough.
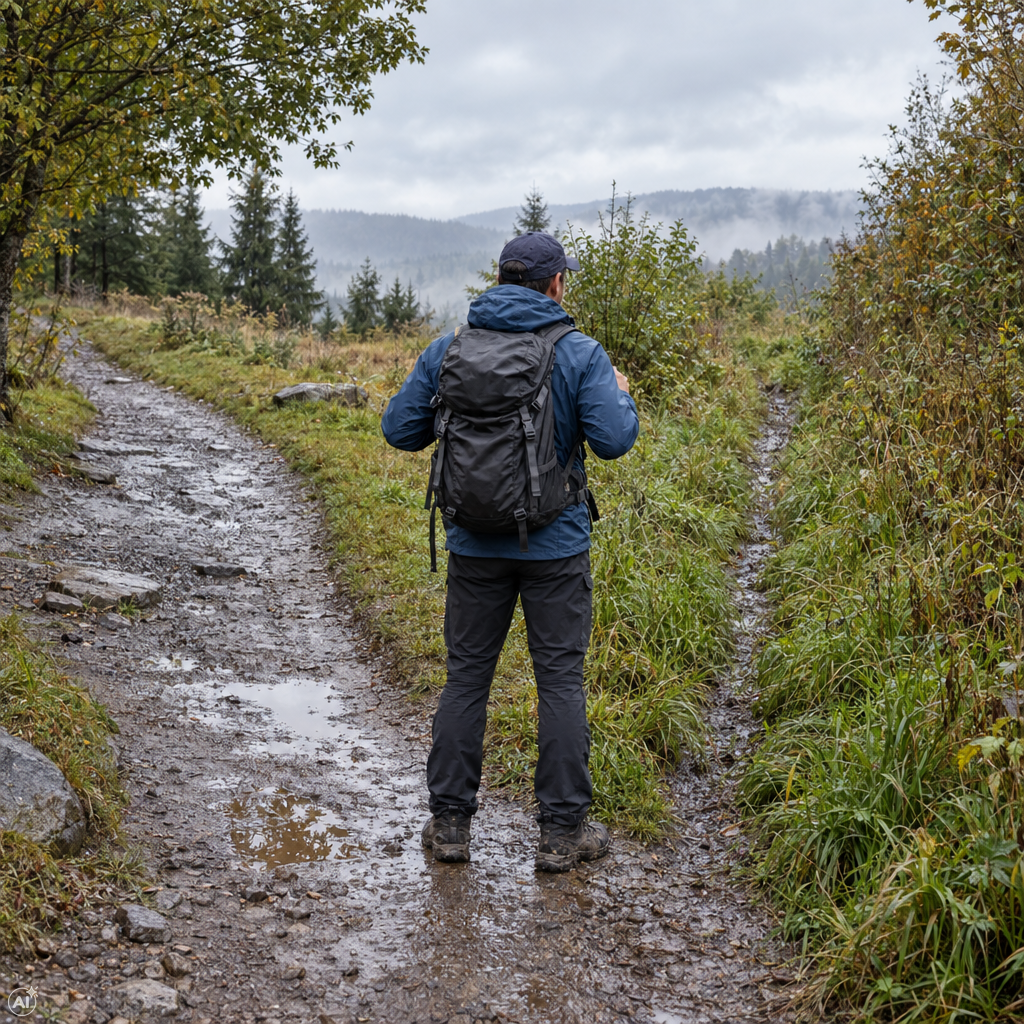
When are low hiking gaiters enough?
If the upper limit of contact stays close to the boot, low hiking gaiters may be enough. This includes small debris and stones getting in from above, occasional splashes from wet ground, or mud affecting the upper, boot edge and lower trouser hem without regularly reaching higher parts of the trousers.
Imagine a route where stones come loose underfoot and puddles cause only occasional splashes around the boot. Low gaiters for mud and stones provide suitable coverage here only as long as the contact does not move higher up. Even in rain, it is the affected area that matters, not the name of the weather.
The limit is clear: anything above the gaiter’s top edge remains uncovered. If wet vegetation regularly brushes against your trousers above that edge, snow collects there or mud splashes higher, a low design no longer protects the whole relevant area. Covering the boot alone does not make up for this difference.
Low gaiters are therefore not automatically the right choice for every short hike. Even an overgrown or snowy section lasting only a few minutes may affect the trousers higher up than a long walk on clean ground. If contact exceeds the reach of a low gaiter, consider whether greater coverage has a specific role on the route.
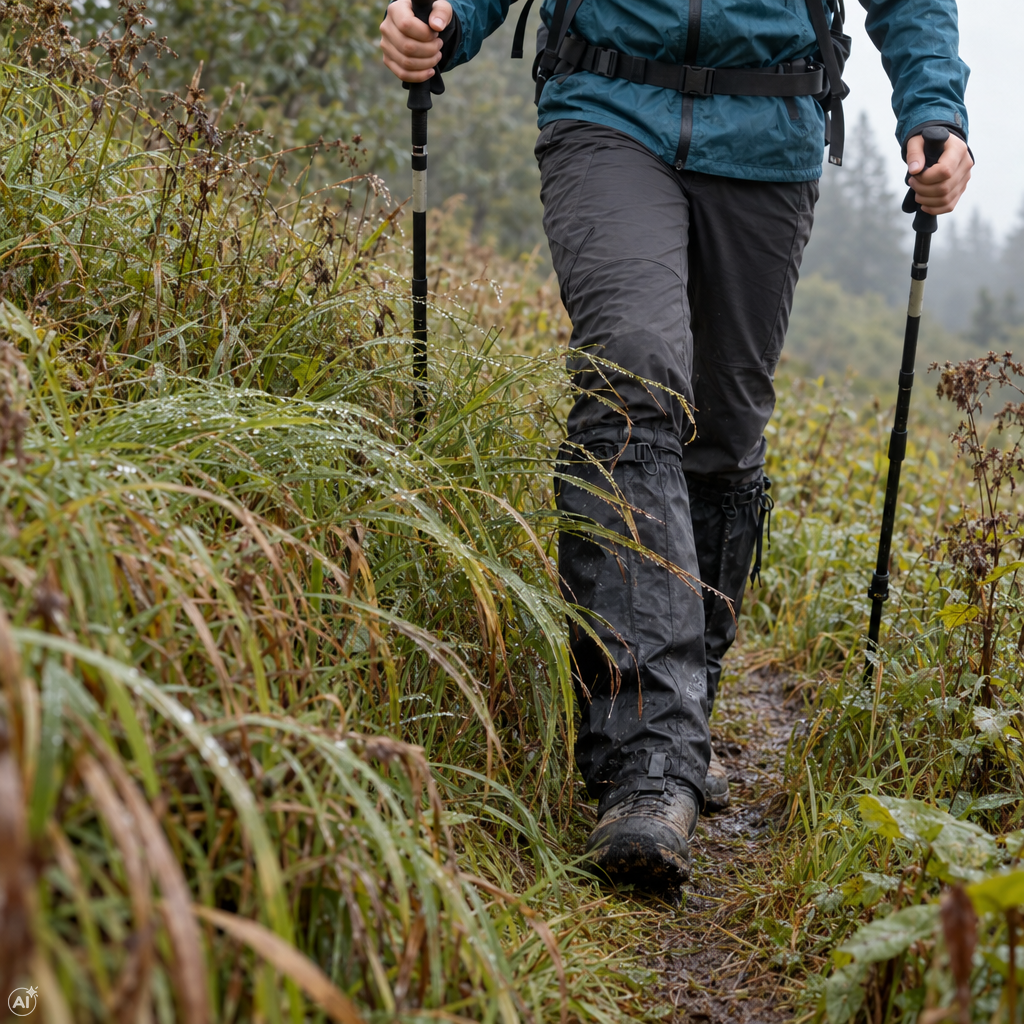
When does greater coverage make sense?
Greater coverage makes sense when contact above the boot is repeated over a section. A typical scenario is a narrow path through wet grass or bushes, where vegetation touches the lower leg with every step. Compare the reach of a high gaiter with the highest point of regular contact. If its top edge ends lower down, the label “high” alone is not enough.
Likewise, high hiking gaiters for snow may be useful on sections where snow repeatedly reaches higher parts of the trousers while walking. The same logic applies to deeper mud or splashes that reach beyond the immediate area around the footwear. It is not only the maximum height of a single contact that matters: a long overgrown passage or a series of snowy sections may justify greater coverage more than an occasional step into a puddle.
The words rain, mud or snow alone are not instructions for an automatic choice. A snowy route may also follow compacted ground where contact stays low; in rain, water may instead be transferred onto the trousers by tall vegetation. The pattern of exposure matters, not the name of the conditions.
If all expected moisture and debris stay around the footwear, high hiking gaiters cover a larger area without addressing another point of contact. Once you have confirmed the need for greater coverage, also consider its effect on movement and comfort.
What trade-offs do low and high gaiters involve?
The reach you need is only the first filter. If low or high gaiters are both options for the route, it also matters how much coverage you are willing to wear around your ankle and lower leg. How they feel when walking is influenced not only by height, but also by cut, degree of tightening and the layers underneath the gaiter.
Low design: It concentrates material around the boot and lower part of the trousers. For a hiker who is sensitive to bulk or tightness around the lower leg, it may offer a more acceptable trade-off in freedom of movement. The trade-off is a smaller covered area. If you choose it for the freer feel, the part you genuinely need to protect on the route should not be left uncovered.
High design: It extends coverage over a larger part of the trousers and may provide a margin where the contact boundary changes during the route. However, this benefit applies only to the affected area. It also means more material and tightening higher up the leg. Whether this feels intrusive depends on pace, layering, cut, adjustment and personal sensitivity; a high gaiter is therefore not automatically less comfortable, but neither is it neutral for everyone.
Ask yourself two questions: does the higher edge provide coverage where contact will actually occur, and is the amount of material around your leg acceptable for the planned walk? The difference between low and high gaiters lies in this balance, not in a universal winner. However, the chosen height does not yet tell you how a particular material will perform when wet.
Does height also guarantee wet-weather protection?
No. Height determines how far the coverage reaches, not the properties of the material or construction. The labels “low” and “high” therefore do not replace explicit information about water resistance, waterproofness or another wet-weather property. When comparing products, separate the coverage area, construction method and properties stated for the specific product.
Ask three checking questions on the product page:
- Material and panels: Does it state only the composition, or also the properties attributed to the individual parts?
- Construction and seams: Does the page describe how seams and joins are handled, or does it say nothing about them?
- Wording: Does it use a precise term for a property, or only make a general mention of use in bad weather?
Imagine two gaiters of the same height. For the first, the product page explicitly states a particular wet-weather property and describes the panels and seams; for the second, you find only the material name with no further explanation. When comparing them, you can work with the stated claim for the first, though even that does not automatically confirm performance in every situation. For the second, you cannot replace missing information with an assumption.
If you are looking for waterproof gaiters for hiking boots, rely only on the current, precise wording for the particular model. When the stated properties suit the purpose, separately check whether the specific design fits your footwear and clothing layers.
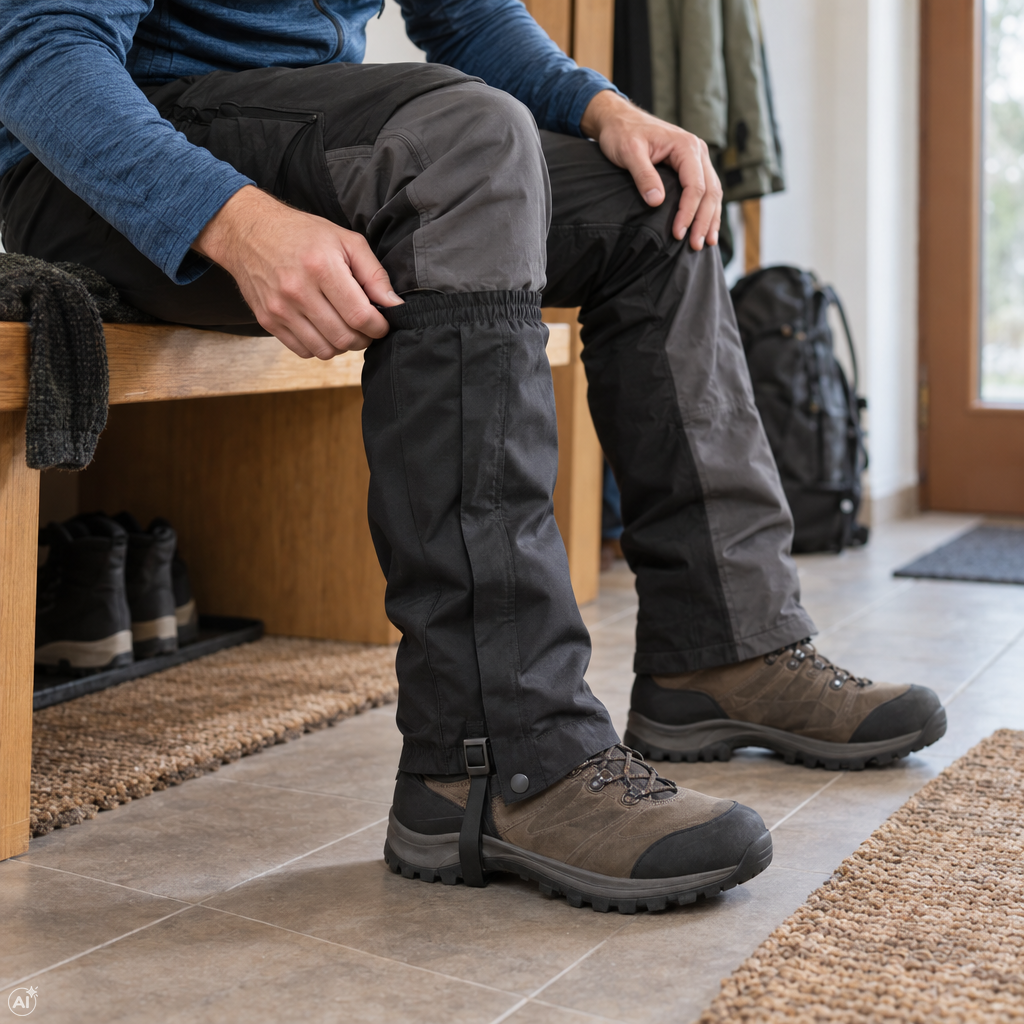
Will the gaiter fit both your boots and trousers?
Even a model with suitably stated properties should be ruled out if it does not fit your full outfit. The right gaiter size for hiking footwear is therefore not determined by boot size alone. Gaiter sizing may differ between models; the size chart and instructions for the specific product are decisive.
- Check the footwear, not just its size. Boots in the same size may have differently substantial uppers, toe-box widths or volumes around the instep. Compare the range stated for the product with the shape of the space the gaiter needs to wrap around.
- Allow for trousers and layers. Check the circumference where the gaiter will fit around the ankle or lower leg. Trying it over thin trousers may not show how it will fit over a wider winter cut or your planned base layer.
- Try your actual hiking outfit. Put the gaiter on your own hiking boots, trousers and the layers you plan to wear on the route. Walk around, step onto a stair and bend both your ankle and knee several times.
- Check how it sits while moving. A gaiter that is too tight may press or restrict bending; one that is too large may leave gaps, bunch up or shift. Check that it stays where intended without excessive pressure and that you can put it on and take it off comfortably.
This kind of test checks the compatibility of hiking gaiters with boots more accurately than a size letter alone. If you are buying remotely, compare the available measurements with your own footwear and the measured circumferences of your full outfit; do not treat unclear information as confirmed compatibility. Then also check whether the closure and attachment work with the particular shape of your footwear.
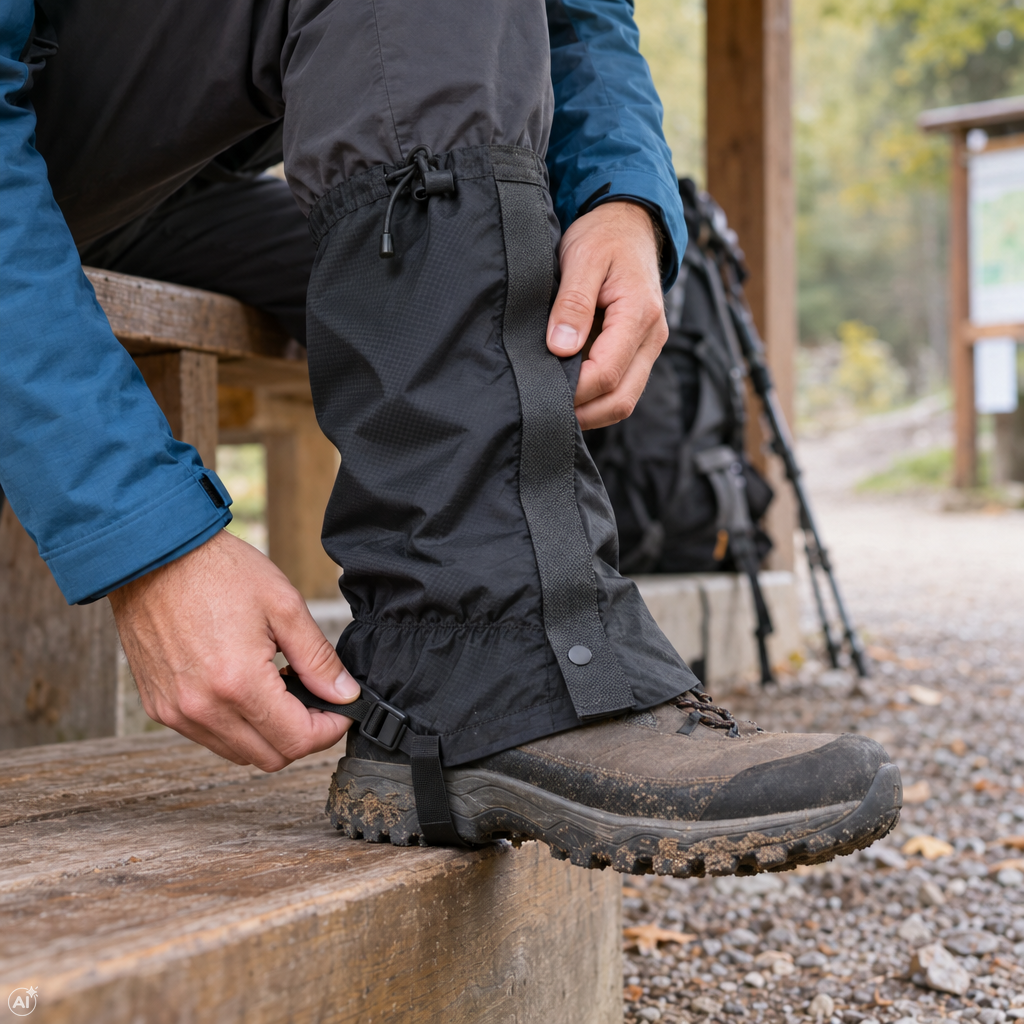
How do you check the fastening and make a final decision?
With a model that is suitable in size, focus on the closure and attachment of the hiking gaiters. Do not assess individual elements in isolation: the gaiter should stay in its intended position on your footwear while stepping and bending your leg, without excessive tightening.
- Closure: Check its type, position and adjustment range. You need to be able to access it when putting the gaiter on and taking it off; if you expect to wear gloves on the hike, try handling it while wearing them. No type is automatically the best — usability in the planned conditions is what matters.
- Top adjustment: Adjust it over all planned layers. The top edge should neither remain loose with a noticeable gap nor create excessive pressure; check it both while standing and moving.
- Attachment under the footwear: Compare its routing and adjustment range with the shape of the sole. The attachment must not merely be “long enough”; it must be possible to route it according to the manufacturer’s instructions for the specific model, and it should not shift undesirably once adjusted.
Always work through the final decision in the same order:
- Determine the source, direction and height of exposure.
- Choose the coverage range you need.
- Accept only a trade-off in movement and comfort that suits you.
- Check size and circumference with your full outfit.
- Try the closure, top adjustment and attachment under the boot.
- Confirm the stated properties in the details for the specific product.
A practical decision record might look like this: exposure reaches above the area around the boot → I need a greater coverage range → I will check the circumference, adjustment, attachment and precise claims for the selected model.
If a product page lacks a measurement, attachment method or required property, do not treat it as confirmed. Check any uncertainty with the specific partner shop; also check the current price, availability, delivery and offer terms there. The result is not a universal winner, but hiking gaiters that suit both your route and your gear.